zondag 23 februari 2014

New Greens...

The first signs of spring are showing and I just can't wait for the sun to start shining again! It always gives me so much energy which I could really use right now... I do feel like changing some things in our home and this weekend I got myself some fresh new greens. The wooden crate I found at the thrift shop earlier (here). I filled it with some succulents & cacti, aren't they cute? The postcard is made by the lovely Liekeland, I just love her work!


The big succulent I just couldn't resist! The pot is spray painted with chalkboard paint and decorated with a white window marker. The new side table on the left is from Zuiver. The top is made with OSB board, I'm so happy with it! The little cup with the graphic blue print I found a while ago at Zara Home.



Pictures made by Marij Hessel

zondag 9 februari 2014

Thrift Shop

Over the past few weeks I collected some new thrift shop treasures... I keep putting them in different rooms of the house to see where I like them best, it's part of the fun! I really love the marble vase I found for almost nothing! It fits perfectly in our bedroom. The little black stool and the chair I thrifted earlier. The little rug in the bathroom I got from my mom, she found it at the thrift shop as well!


This black and white plate is a great addition to my collection of graphic ceramics! I also found this wicker basket where I keep some of my magazines now. The stool is also thrifted a while ago which I painted mint green. I don't know why but thrifting always makes me excited! Maybe it's because most of the time, there's only one of this particular piece in the store and you're the lucky one who spotted it first!


Pictures by Marij Hessel

zondag 26 januari 2014

Ikea Brakig Collection

This Friday I drove to Amersfoort to see the limited Brakig collection at Ikea. I got pretty excited when I saw the pretty colours and graphics! It instantly got me in a happy mood! How was I supposed to choose between all of these lovely designs?! Lately I've been leaning towards pastels so this made my decision a little bit easier... I wanted to change our side table for a while now and I'm so happy with this light & fresh new one! Off course I had to have some of the ceramics with a graphic print. I could go on and on about this awesome collection but maybe these images speak for themselves...


Pictures by Marij Hessel

zondag 19 januari 2014

A Happy Home

Last week, I made some small changes in our kitchen. I have a soft spot for ceramics & I have been collecting nice plates for a while now. A couple of them are hanging on the kitchen wall now so I can enjoy them even more! 
I was surprised to find the Dragonfruit at the supermarket. I saw it once at Mireille & Co and wondered where you could find this beautiful fruit! I made a delicious smoothie with it...

I also found a purpose for the clips I bought at Tierlantijn a while ago and used them as hooks for my tea towels. I'm pretty happy with how our kitchen turned out. The only thing I'm thinking about is maybe painting our worktop black.... What do you think?


Pictures by Marij Hessel

donderdag 9 januari 2014

Etsy Love

It's time to share with you some of my latest Etsy favorites again! I keep finding the greatest wannahaves & gifts on this creative network. I just love it! Scroll down to see what's on my wish list from now on!


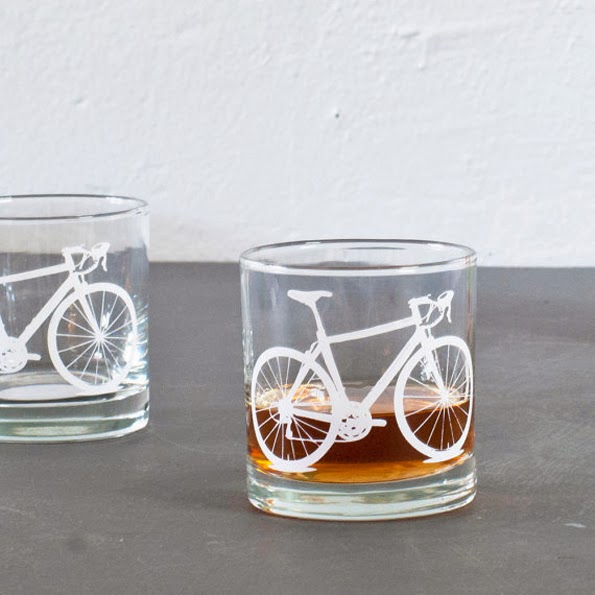
1. Screen printed glasses by Vital
2. Concrete hanging lamp by GANTlights
3. Astrology Wall Calendar by Prismaticprintshop
4. Cat Pillow by Pillowlink
5. Diamond Pot Holders by xxxRedstitcHxxx
6. Return Address Stamp by Nativebear
7. Mini Jungle by Milimbo
8. Screen printed Plates by Mbartstudios
9. 2014 Calendar by The Stationery Boutique

zaterdag 4 januari 2014

Thrift Shop

Today I would like to introduce a new item on my blog that I call "Thrift Shop". My love for second hand stuff makes me a regular customer at our local thrift shop. I've never left there empty handed! From now on I will share with you my thrifted items and how I use them in our home. This weekend I found myself some lovely things again... Another teapot I couldn't resist!! I also bought this vase which I think is handmade. As you can see I gave it a little make over with a white primer and some bright yellow spray paint! As good as new!
I'm already looking forward to my next thrift shop visit...


Pictures by Marij Hessel

zondag 15 december 2013

A Happy Christmas Home

This weekend was all about making our home Christmas proof. I finally finished decorating our DIY Christmas tree (click here for the tutorial). Last year I made some black and white ornaments which I still love so I only added the yellow honeycombs (Ikea) and a couple of white ornaments from Dille & Kamille.


Last weekend, me and my friends had a super fun & creative day! First we took a workshop making our own leather bags and after that we made a bunch of crafty christmas cards. We were unstoppable! It's possible I have to make some more because I want them for myself as well ;)


I couldn't resist getting a tiny living tree as well, they're just so cute! I painted a little pattern on the pot with a white "Window Marker". Well, I think we're ready for Christmas to come!


Pictures by Marij Hessel

maandag 2 december 2013

DIY Christmas Tree

This weekend me and my sweet man made our own wooden christmas tree. I was inspired by this image on Pinterest and figured it would be a great DIY project! 

This is what you need:
- 11 round sticks with a diameter of 1,7 cm in several lengths
(on the first picture you can see which measurements we used)
- 1 round stick with a diameter of 3,5 cm and a length of 190 cm
- a drill
- 2 headpieces (speed drill) as shown on the picture to make round holes
- a tapeline
- a saw


Use the thickest stick for the tree trunk. First put dots on the places where you want to place the round holes (we used a spacing of 15 cm in between the holes). Place the stick on a solid surface or use a workbench, use the "speed drill" headpiece with a diameter of 1,7 cm and carefully start drilling the holes into the stick. Make sure you keep the drill straight! 
Now for the foot of the tree, use the "speed drill" headpiece with a diameter of 3,5 cm. Make a 3,5 cm hole in the middle of the two shelves as shown on the picture. 


You can place the thin sticks into the holes now, the longest at the bottom and the shortest at the top. Now it's starting to look like a tree!


To finish the foot, place the 2 shelves on top of each other crosswise and add a piece of leftover wood underneath the upper shelf to fill up the height difference. Place the stick of the tree inside the hole of the foot and the foot will keep the tree balanced. For some extra security you can add some screws to keep the tree & foot together.

Now, let's start decorating!


Pictures by Marij Hessel
Related Posts Plugin for WordPress, Blogger...